Friday 21 November 2014

Thick and fast ,,,sort of...... Pictorial Edition

Well it took the best part of a day for this but I am happy still nonetheless. I started on the rudder thinking I'd have it done by smoko or lunch, but ,yes,it took all day.


It basically started here..... then went to 


Here...... to start de-burring all those holes......

Then finally went to ..... 


Here,then topped the day off by being in 

Here!... With my pink floaty and Beer. 

Thursday 20 November 2014

Smashing the work out!!!!!!

Well I haven't actually been 'smashing' anything, but a saying we have in my industry or trade when things go well, or you get heaps done, is called just that "smashing it out". This week has been one of those times when everything has just been falling together without a hitch or mistake. After having gotten over the lowered seat option, I knuckled down and got back into it. Up to now I have been putting off finishing the elevator due to the fact that I wasn't sure how to get it all straight and lining up without a hitch. I had a few issues with the last plane I built, with a few things like this, and I was determined not to make the same mistakes.   I needed a large enough flat surface and I didn't have this in the shed so along came the kitchen bench-top :)

Served absolutely perfect for the job and the wife even helped me most of the day without complaint (sort of) and the end result came out perfect. 


I managed to do a little shed flying the day before as well. Seeing as the seat was installed I thought I would see if there was enough clearance for us both. I temp fitted the seat cushions supplied by Sonex and tried it on. I have to say I am a bit worried about clearance as I only really had an inch or so between my head and the canopy and with a hat and Zulu 2 headset things might get tight. I was sitting forward a bit and perhaps that may not have been helping. I expect when I'm flying I'l be more than likely leaning back and relaxing so maybe all will be good. Pity help the taller passengers I take. 
I can always do the lowered seat mod later though if I need to I guess.

I was absolutely pumped by how the horizontal tail tips fitted at the end of the day. I was such a nice fit around the leading edge of the horizontal stabilizer. I obviously won't be riveting it on until I paint the tail feathers but it is all drilled and ready to go. Both elevators line well with the tips ,so Happy Days.  Time to fit the Stabilizer to the plane I guess :)    

Tuesday 18 November 2014

A WEEK OFF

So here I am with a full week off, and seeing as I work one week on, one week off, that means three weeks off!  Oh yeah! I basically squandered the first week with travelling to Perth for family stuff but now I'm back and ready for BIZ. The last two days have seen a great leap forward in my mind. I am starting to really get the hang of these plans and reading them. I am still having issues with hardware as I go along but I have been lucky so far regarding the fact that I have had quite a few spares from the last plane build.

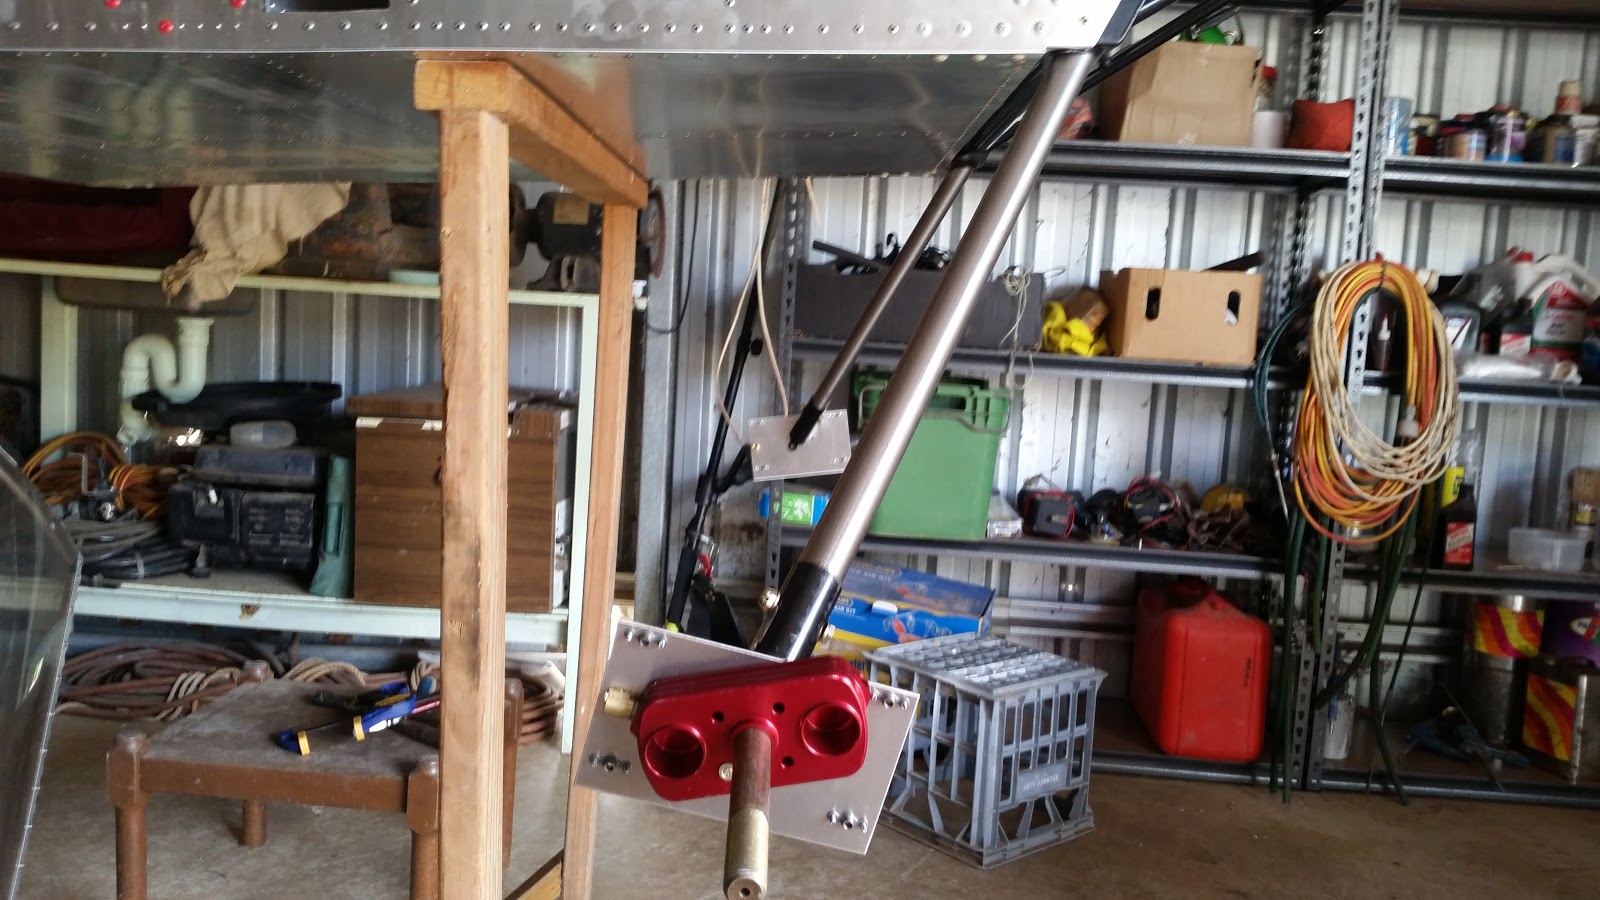
I made up the brackets for the hydraulic brake master cylinder. As I stuffed one up, I got the pleasure of making two on one side of it, but it was all good. 

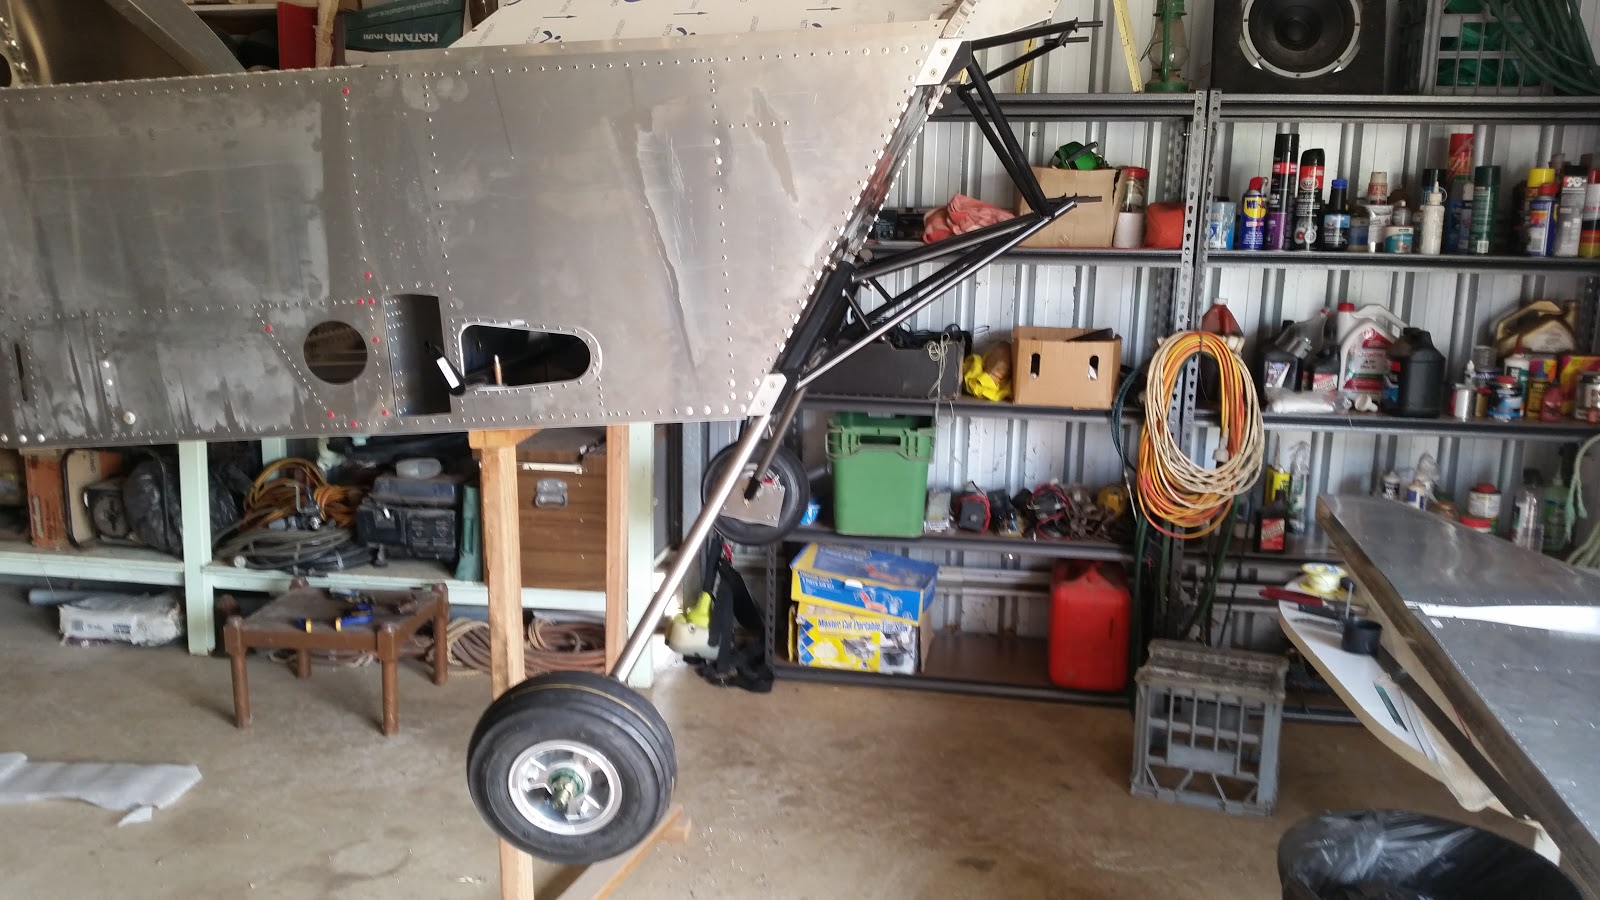
The fuel tank is now sitting in position. I have screwed in all the bungs and fuel level probe and only have the breather to decide upon. I would like to use the piece of ali tube going straight up to allow more fuel to be added to the tank, but am very worried about fuel spillage onto the windscreen if I ever find myself in the negative G situation. Plus it looks a little unprofessional.  I will have to read up on it more before I decide, but I expect I will just go with the normal fuel vent to the bottom install. 
I have no idea how people manage to get the AN3-10 bolt into the center join of the tank straps. I went and bought 5mm threaded rod cut them to 3" long and joined them then wound them in tight. I am hoping, once the straps have been in there for a while, I can hold them together with some clamps of some sort and replace the threaded bar with the correct hardware. I have plenty of time to change that later. 

I had another one of those 'Walter Mitty' moments where I seemed to be staring at the plane for ages, moving onto the plans, staring at the plane again, and so on. When ordering the quick build I asked for the lowered seat option. I have since found out that I have been sent the standard seat arrangement.  This took me a long time to work out by reading the plans and working out the differences. As I look back on it now it is very easy to tell in hind site. As it stands now I am not too concerned as both myself and wife are quite short in general. I can see what needs to be done to change the seating but I will leave it for now and worry if it becomes a problem in the future. 


So I've 'gone for broke' and charged forward with the normal arrangement. Who knows, Maybe it will be really good and I'll be able to see over the dash while taxying :)  I hope so. 

The lower hinge, I ended up riveting on before the day was out, and tomorrow I plan on fitting the other two hinges at the bottom and the top.  I have realized I have not made a cut away for the hinge pins at these two areas so will also do that in the morning. 

I don't have a picture but I also riveted on the wing spar carry through box and the associated brackets today. I think most of the rivets have been left out as the option of the tri landing gear brackets would need to go there if they were required. As I'm running the standard gear I riveted it all up.  I am really hoping I haven't made an oversight, and missed something.  Again, I sat for ages looking at the plans before I decided on this bold move. I don't fancy having to drill out over 100-200 or so rivets if I have made a mistake.

So what will tomorrow bring?


Another week in review

Well saying a week in review is quite an exaggeration. I have worked on the plane for one day this fortnight. However,,,, today was a productive day.


Basically it is now on it's wheels and I can reach everything. I have started on fitting the hydraulic brakes, the flap torque tube and the fuel tank and so on. I fitted the rudder cable attach brackets today and hooked the springs up.  It was definitely nice to see it on it's wheels and I think I may start to make some real progress now. 

I was a little perplexed about the hydraulic brake fitment today. I was looking at the plans and was trying to work out where I had gone wrong.


The backing plate was essentially pointing towards the ground and when I was looking at the plans it looked as if it was supposed to be level according to the fuselage. I was also looking at the brake plans and noticed the wheel spat seemed to back this opinion up. So after staring at the thing for a LONG time trying to work out what was happening I looked on the Sonex builders site and found out everyone else had this same problem. I just couldn't get over, for a while, why Sonex would release this brake option and it not be according to plans. I kept thinking I had done something wrong. Upon looking at it, really, it makes no difference to the way it all works, but why not have it exactly as the plans state? Anyway rant over... Besides this:
Errr,, I ordered the clevis pins straight from the plans and this is how they turned out. About 6mm too long. I could normally deal with this so easily, just putting it down to aviation, however while I was in Perth I had to drive for over an hour each way to get to the Aircraft shop to buy these.  And that was after waiting two weeks for them to be ordered  in.  It was pretty disappointing to then find they were incorrect. I know I can order new ones, or space them out, or leave them as is, because the wheel bearing dust seal will stop them walking into the brake disk. It's just that I really wanted them to fit.
Rant now definitely over.

Saturday 8 November 2014

Slow progress

Well it has been another slow week for building on the Sonex. Having once again spent most of the week trying to sort out issues on the Aerovee in my Aeropup,  I basically just ran out of time. I flew the pup 4 times during the week but as the temps were really high they were limited flights and each flight was after a modification to either the lower cowling or the baffles. I think this week I am going to try and concentrate on opening up the front of the cowling for more air flow as I have basically exhausted all of my ideas on the lower cowl and baffles. I am just hoping this may be the answer.


After looking at the landing gear for around a week I finally got the courage to drill the lower axle mounting bolts through the titanium landing gear legs. I had set up a tight string line and set the toe in to what I hope is correct, according to the Sonex plans. It looks okay but I'm sure I'll find out when I put it down on it's wheels this coming week. I have re-ordered the correct AN hardware for the landing gear and have only used the stainless steel bolts to hold things in place for the time being. I noticed  that the hardware kits also lacked the correct hardware to mount the new hydraulic type brake callipers to the axles assy. I have to admit it is really disappointing that when you order what you would think of as a complete braking option, you have to go out and buy more stuff. So anyway I have made a list of hardware and clevis pins and anchor nuts and so on and hopefully they will arrive for Tuesday or Wednesday. At least then when that gear arrives I can fit the wheels and lower the fuselage onto the ground and take it off those oversized stands that aren't much good.

So looking ahead now I have quite a few things I can go on with next week. I really want to carry on with the tail build but the aft spar strap is still in transit with the new canopies.  I'm sure it can't be too far away so looking forward to having that section complete. Now that I also have all the bronze bushings I need,  I can carry on installing the controls and cabling for the rudder.

On a non Sonex related topic, two of us from the local Midwest Recreational flying club recently went and picked up our National CAGIT ('Come And Get It') trophy!


It was a fantastic feeling getting our hands on the trophy as it had sat dormant for the last 12 months, due to the fact that it was located inside controlled airspace. As it turned out the trophy was moved to a non controlled aerodrome on the day of the pick up. That was fine and the only notable point was it was about 15 mins each way further.

The pick up was great and easy to do, so a flight plan to do a victory lap over Perth city was submitted.  After a small error with radio channels (require hearing check) permission was given on route and the victory lap was taken ;)


I have to admit I seriously doubt that I will forget this moment in a long time. It was one of those awesome highs you can get from flying. It was definitely up there as one of the best.